From the moment you list your items to the final step of delivering them to your customers, the selling journey on Cargo flows seamlessly, ensuring a smooth and hassle-free experience.
Preparing The Shipping Label
At the beginning of creating a new product, you will notice there is a section asking you to select your Shipping Box Size. This includes;
📦 USPS Large Flat Rate Box
📦 USPS Medium Flat Rate Box
📦 USPS Small Flat Rate Box
When you have selected your Shipping Box Size, your saved address from your Account Settings will become the default ship-from address.
Please note: this means your shipping label is only valid with USPS and cannot be used with UPS or Fedex.
You’ve Received A Purchase!
Once a customer has purchased your item on Cargo (yay!), you will receive a notification under Activity 🔔 .
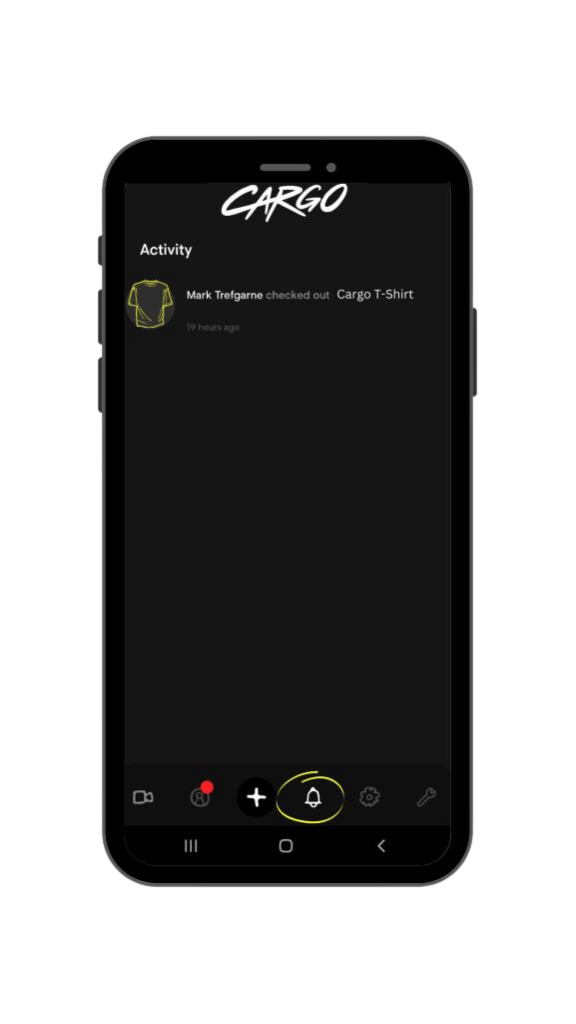
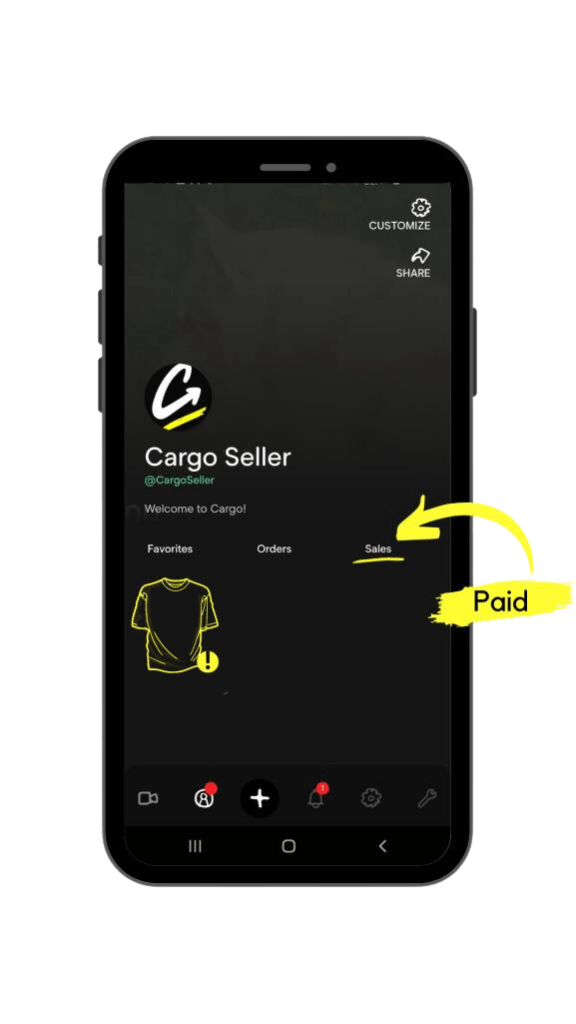
To complete this order, click on your Profile 👤 and swipe across to Sales.
Click on your video listing (you will see an alert symbol at the bottom corner of the video)
Click Ready To Ship? Tap Here. (You will then see the customer’s details and the breakdown cost of the purchase order)
📦 Click Ready To Ship? Get Shipping Label
📦 Your Shipping Label will now be available! Everything is all set for you to simply drop off and mail the product you’ve sold.

The buyer will continue to receive automatic tracking updates inside Cargo throughout the shipping & delivery journey 🤳🔔
Shipping Costs
When you create a product to sell and select a Shipping Box Rate Size, the app will calculate the appropriate cost for shipping and taxes during the checkout process.
The breakdown of shipping & taxes are included when the customer pays for the item, and then the shipping label is created for the seller accordingly.
When Do I Get Paid?
Once you have shipped the item using the shipping label provided, the app will be notified on the current order status. When the status goes to ‘in-transit’, you will be able to request payout from your Cargo Wallet!
